Introduction:
The Visual Studio IDE is very flexible and customizable. In this blog, you will learn how to customize the Visual studio editor context menu, which improves productivity and developer usability.
Customize context menu:
Step 1: Open Visual Studio IDE. I like to use the selection format feature frequently from Edit->Advanced->Format Selection to format my code. We will see how to add this option to the editor context menu in the following step.

Step 2: Click on Tools from the menu and select Customize, as shown in the below figure.

Step 3: Select the Commands tab from the customize window and select “Editor Context Menus | Code window” from the context menu option.

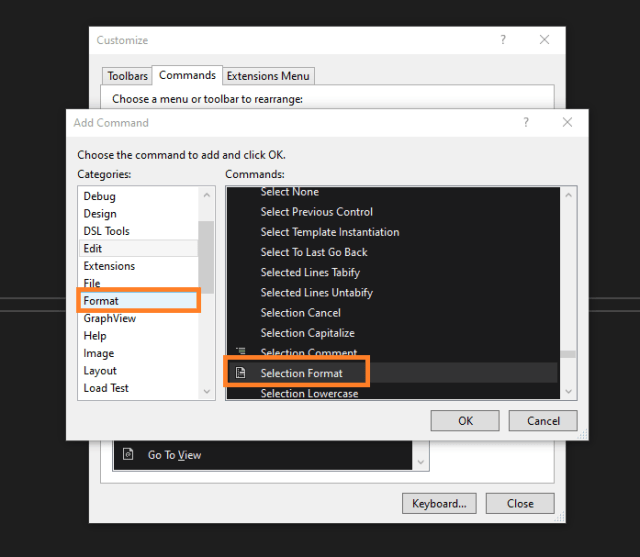
Step 4: Click on Add Command from customize window, choose Edit -> Selection Format, click on ok now you can see the “Selection Format” option has been added to the context menu as shown in the below figure.

Step 5: Go to editor and do right-click, you can see the “Selection Formation” option in the context menu.

Summary:
We saw how the Visual Studio IDE is customizable with an example of adding the “Selection Format” option in the editor context menu. We will see more tips and tricks of Visual Studio in my next blog.
I hope you have enjoyed this blog. Your valuable feedback, questions, or comments about this blog are always welcomed.